with Bill Balding
It’s the summer of 1918, after a massive effort the Western Front has stabilized after the surprisingly aggressive German spring offensive. Though most of the General Currie’s Canadian Corps held the line around Vimy Ridge during this period, one of his most valuable units, under Major Raymond Brutinel’s, the Motor Machine Gun Corps provided much needed mobile firepower at critical moments. In June of 1918, he gives a speech at a supper club in London extolling the achievements of the allied forces but cautioning his audience that Germany is far from beaten, hard work and loss of life are necessary to bring the war to an end, an end which he believes will be in 1919. How did he get to this point in history?
At the beginning of the war, Britain asked for and received a commitment for troops from their Dominions. In the case of Canada, the firebrand Minister of Militia Sir Sam Hughes scraps the existing mobilization plans and calls for volunteers. Though there was a small corps of Permanent Force officers and enlisted troops, Hughes decides to officer the Canadian contingent with militia officers and picks men he knows. Sir Richard Turner, Arthur Currie, and Malcolm Mercer, all militia veterans, were chosen to lead the three brigades of the Canadian Expeditionary Force with many of the staff positions filled by British officers who had experience in respective areas. British General Sir Richard Alderson is appointed the commander of the Canadian Division.
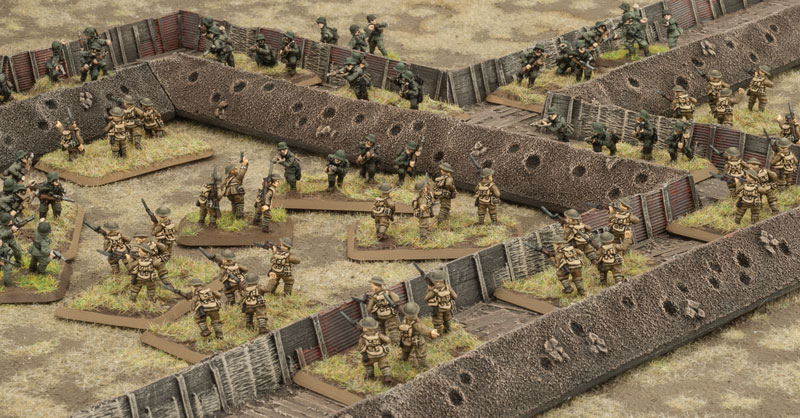
The Canadians gain their first combat experience at the Second Battle of Ypres experiencing the pain and horror of gas warfare. Over the next year due to battlefield mistakes, poor intelligence, coordination, and personality conflict General Alderson would be replaced by another British General, Sir Julian Byng recently returned from the evacuation of Gallipoli. The three original brigades are expanded into Divisions creating the Canadian Corps. All three Colonels become Brigadiers however in the summer of 1916, Malcolm Mercer accompanied by his aide and escorting troops come under fire from the German lines during reconnaissance near Mt. Sorrel. During counterbattery fire British shell fragments kill Mercer, the surviving personnel becomes prisoners for the rest of the war. Louis Lipsett replaces him, a British officer who served and instructed in Canada before the war. With the loss of territory in their sector, Currie approaches Byng with a plan using set piece objective tactics for regaining lost ground and is successful; however, this followed by months of the back and forth fighting at the Somme, which sees few tactical gains. One of the few benefits won by a primarily Francophone unit; the 22nd Battalion succeeds in taking the town of Courcelette. During the summer/fall of 1916 the 4th Division takes their place within the Corps under General David Watson, another pre-war militia officer, who like the first three, owed his initial placement to Minister Sam Hughes. As the 4th is “new” to the front, they remain at the Somme when the other three Divisions rotate out of the line.
Over the next months, senior personnel changes occur which affect the Corps. Sir Richard Turner, is rotated to England taking command of the Canadian Forces in England responsible for the training and assignment of replacements troops. 2nd Division command assumed by Henry Burstall, a long-serving Artillery officer from the Permanent Force. In early January 1917, Currie is detailed to an allied officer conference studying the lessons from the French defense of Verdun and the Somme. He returns with a report whose experiences are the framework for Vimy Ridge, Hill 70, Avion, and Passchendaele. The Canadians reputation gains them respect on both sides of the lines, and in 1918, Currie’s peer General Monash of Australia requests their assignment on his flank in the upcoming late summer offensive. The attack is scheduled to kick off at Amiens and launch what is known today as the “One Hundred Days” campaign. With the breaking of the Queant-Droucourt line in early September, open warfare returned to the Western Front. Depending on the objective Currie and his Generals adopted their tactics utilizing set piece tactics and mobile units as necessary. In the first week of November 1918 Canadians were moving into Mons, Belgium occupying favorable positions just before the armistice on November 11th. Though Currie and troops would spend more time in Europe as part of the occupation force, in only four years, the Canadian Forces had evolved from a mainly part-time militia to a highly effective, respected, feared fighting force.
Historical Missions:
Battle / Date/ Mission Special Rules/ Recommended Mission
Amien, August 8, – Preliminary Bombardment (Creeping barrage, German rolls for affected Infantry/gun saves), Dawn, The Big Push
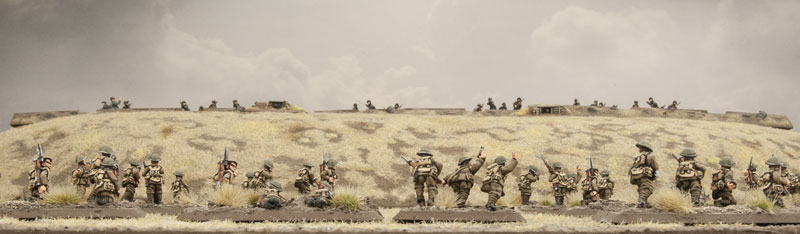
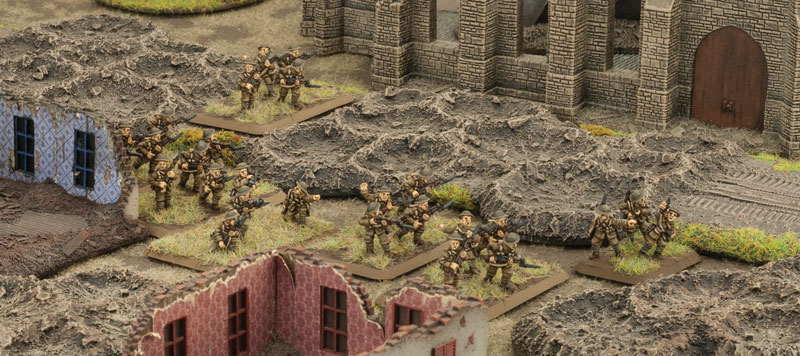
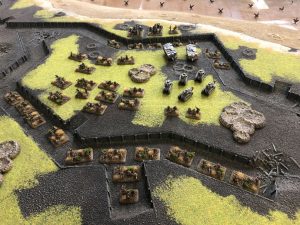
Though the Canadians had spent much of the spring and summer in the vicinity of Vimy Ridge they were requested by the Australian commander Sir John Monash to be his right flank at Amiens beginning the summer/fall offensive known as The Hundred Days. Their objective was Hill 102, just South West of the Beau Count rail line. British 3rd Corps on the left flank, Australian Corps in the center with the Canadian Corps (2nd, 1st, and 3rd Divisions) on the right flank, with the 4th Division in reserve. There would be no preparatory bombardment masking the assaults launch; this would become characteristic of the Canadians planning to the end of the war. The Corps preferred to keep the enemy off balance with the Counter-battery fire and the combined creeping barrage of Field Artillery and Machine guns.
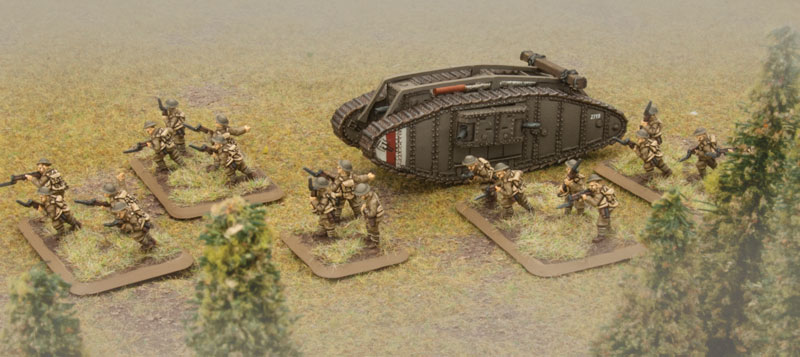
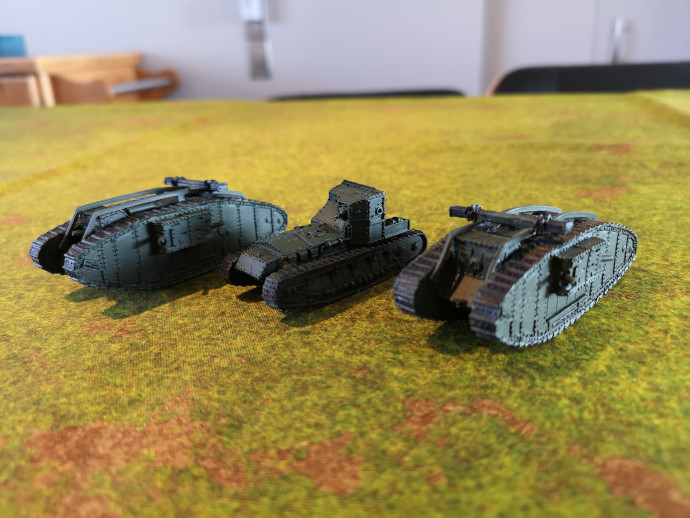
One of the most significant changes was that the Creeping Barrage would lift every two minutes and move forward 100 yards, one year prior at Passchendaele the CB lifted every eight minutes. This faster pace supported a more aggressive assault on the enemy positions. Due to surprise and the CB, the German defenses do not withstand the initial onslaught. However, with the fog burning off the German Anti-tank guns and artillery fire on the tanks. Over the next three days due to stiffening resistance and gun discipline the 342 tanks which began the battle on August 8th reduces to 38 by the 11th. Also, the lack of training between the infantry and tank crews results in infantry halting upon encountering a machine gun nest or pillbox, and once tanks had broken down the infantry would cease their forward movement until operational armor arrived. Cavalry was present but lacked coordination with Infantry and Armor to create a pursuit upon breaking through the lines. Despite these shortfalls, they inflict 000’s of casualties upon the Germans, gaining more territory than ever during the war.
The German leadership referred to August 8th as “The Black Day of the German Army.” The first day saw the “Whippet Rampage,” after losing tanks in his platoon one tank commander continues seeking out targets only stopping after his tank catches fire from leaking gas cans shot up during the fighting. The Mark V and Tadpole tanks were used supporting the infantry with the Tadpoles carrying MG crews forward to provide additional counter attack protection for the infantry. Additionally, RAF and French aircraft aided the ground assault, Currie as other Allied commanders were learning the value of integrating air into their battle planning.
Upon reaching the old Somme battlefield, the British leadership suspended the attack with input from the Canadians determined continuing the assault across such defenses would yield little strategic advantage, returning to set piece Trench Warfare, and shift their attention to German-held areas of Arras, shielding Cambrai the logistical heart of the Kaiser’s armies.
Arras, August 26-28, Preliminary Bombardment (Creeping barrage, German rolls for affected Infantry/gun saves}), Nighttime, Through the Mud and Blood
Just beyond Arras was the Quent- Drocourt line* “hinge of the Hindenburg line,” breaching this obstacle enables the Allies the ability to roll up on the German flanks both north and south. To get there, they would have to break through the fortifications in front of Arras. Until reaching Mons, this would be the Canadians area of operations.
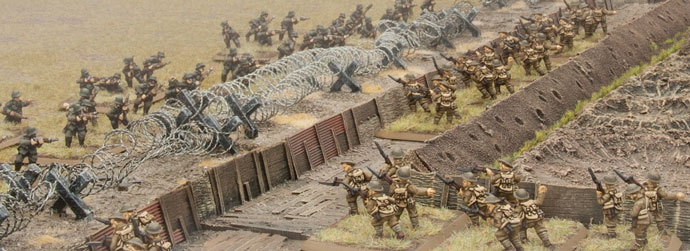
A nighttime attack was planned, as primarily Infantry / Artillery assault. The objective was the Arras – Cambrai road for further movement on the Q-D line itself. Only eighteen tanks were assigned to the assaulting divisions, this due to prior combat losses and mechanical failure, evidence of the limitations of new technology. Conversely, a lot of airpower took part in both close air support and aerial bombardment both day and night. As with earlier plans, there was no preparatory bombardment, the creeping barrage by Field artillery, counter-battery by Heavy guns (mostly British units) and machine gun bombardment began at 3 a.m. catching the Germans off guard. The assaulting divisions were the 2nd, 3rd and Scotland’s 51st Highland Division. After several days of hard fighting, due to heavy casualties and poor weather grounding all planes, negating the allies advantage of air cover resulted in a suspension of the assault. The Germans pulled back to the Q-D line protecting the approach to Cambrai. General Currie referred to this as “The hardest battle in its history.” Relieving their surviving comrades, the 1st, 4th, and British 4th Divisions assumed front line positions.
Quent – Drocourt Line, September 2, (Creeping barrage, German rolls for affected Infantry/gun saves}) Dawn, Through the Mud and Blood
Breaking through the Q-D Line provided an opportunity for flanking attacks both north and south. The objective was the Arras-Manquin road just beyond the fortifications. The positioned Divisions had the support of 20 Field and 11 Heavy Artillery batteries. Heavy guns both isolated the battlefield from a counter attack and using counter battery fire eliminating the German guns. This time the Canadians moved the Field guns forward every three minutes keeping pace with advancing Infantry and tanks. Once the weapons reached the Q-D Line, they would halt continuing for thirty minutes to disrupt local counterattacks. For this effort, the assignment of two Mark V companies along with strong air support provide mobile fire support.
The whistles blew at 5 a.m. with the barrage just ahead of the Infantry and Tanks along a 7,000-yard front. Despite gains made the Germans held up the 4th at Mount Dury, eventually driven off though, with heavy casualties, the 1st went after the Buissy Rail switch. Rather than fight with their backs to water the Germans retreating beyond the Sensee River and Canal du Nord. This withdrawal cost them the gains made during the previous spring’s Blucher Offensive and caused them to initiate requests for armistice terms. The Canadians realized that the days of trench warfare were truly over. Now the unique obstacle of Canal du Nord lay in their way.
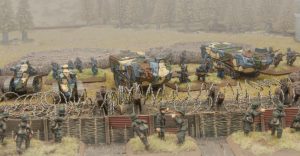
Canal du Nord, September 27, Preliminary Bombardment (Creeping barrage, German rolls for affected Infantry/gun saves}), Dawn, Delayed Reserves for Canadian tanks and MMG units, Bridgehead
The immediate objective was to get the 1st and 4th Divisions across the dry canal bed and into the town of Bourlon and Bourlon Wood. The dry bed constrained the assaults front to two thousand yards. If the Germans guessed correctly, they had the Canadian troops pinned into a tight killing zone. Though Currie was cautioned against this plan by several senior officers, he insisted the Corps could pull it off. After the initial success of the lead troops, the 3rd and British 11th Divisions continue exploiting, expanding the attack towards Cambrai if possible. This time the 2nd Division took the position as the reserve force.
No preparatory bombardment was used misleading the Germans to point and time of the attack. Counter Battery Staff Office used Sound ranging, Triangulation and aerial reconnaissance determining the location of opposing batteries which they hit with gas and High Explosive rounds silencing the preponderance of Hun guns. 18 Pounders for Creeping Barrage were planned to be moved forward in relays taking advantage of their lethal range along with the MG barrage. The canal crossing was successful and demonstrated an ability to coordinate the various combat and Support branches in executing the assault, pushing well past the canal while defending from counter attacks is a tribute to leadership’s planning and the implementation by the coordinating units. The next step was taking Cambrai, strangling the Germans supply lines.
Cambrai, October 9, Preliminary Bombardment (Creeping barrage German rolls for affected Infantry/gun saves}), Dawn, Strategic Withdrawal, Rearguard
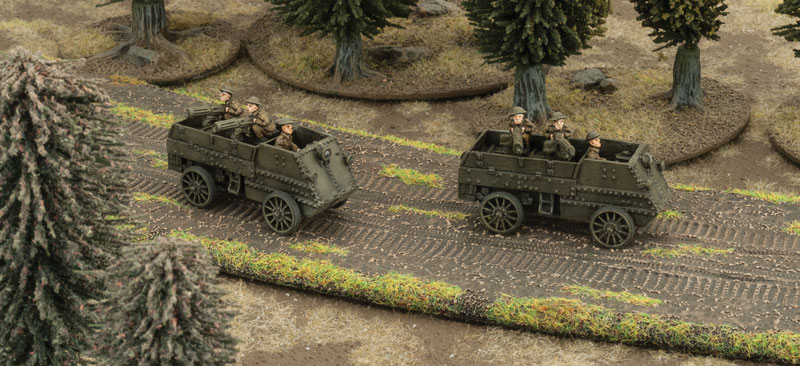
Germans retreated out of Cambrai without making a coordinated effort contesting it, what they did not take with them was set on fire. Canadian Engineers moved quickly dousing as many flames as possible. Localized counter attacks by Germans including captured Mk V’s (Beute Panzers) supported by infantry took on Currie’s Field Artillery. The gunners engaged the tanks over open sights destroying or driving them off while Raymond Brutinel’s Motor Machine Gun Brigade eliminated the infantry assault.
Valenciennes, October 31- November 2, Preliminary Bombardment (Creeping barrage, German rolls for affected Infantry/gun saves}), Dawn, The Green Fields Beyond
Counter-Battery fire, point blank Field Artillery used for creeping barrage, Motor Machine Gun barrage
The battle for Valenciennes depended upon control of Mount Houy with its commanding view of the city and surrounding terrain. Between October 24th to 28th, the British XXII Corps temporarily attained the summit and subsequentially been driven off by German counterattacks. Upon receiving his orders, General Currie turned to his Heavy Artillery officer Andrew McNaughton and Counter-Battery Staff Officer Henry Crerar. They developed a plan to barrage enemy positions and possible assembly areas eliminating a substantial amount of the threat destroying 110 enemy guns. Along with MG barrages, the infantry assault swept the Germans from Mount Houy and into the city. Anticipating the German practice of immediate counter-attacks the Canadians moved Heavy Artillery forward shelling the expected assembly areas.
Mons,
Late on the night of November 10th, Canadian troops entered the city of Mons almost four years since the British had retreated from it. Though expected, armistice confirmation did not reach General Currie until six a.m. on the 11th. An armistice is not a peace treaty. Knowing that, each commander sought the best tactical position their troops could occupy.
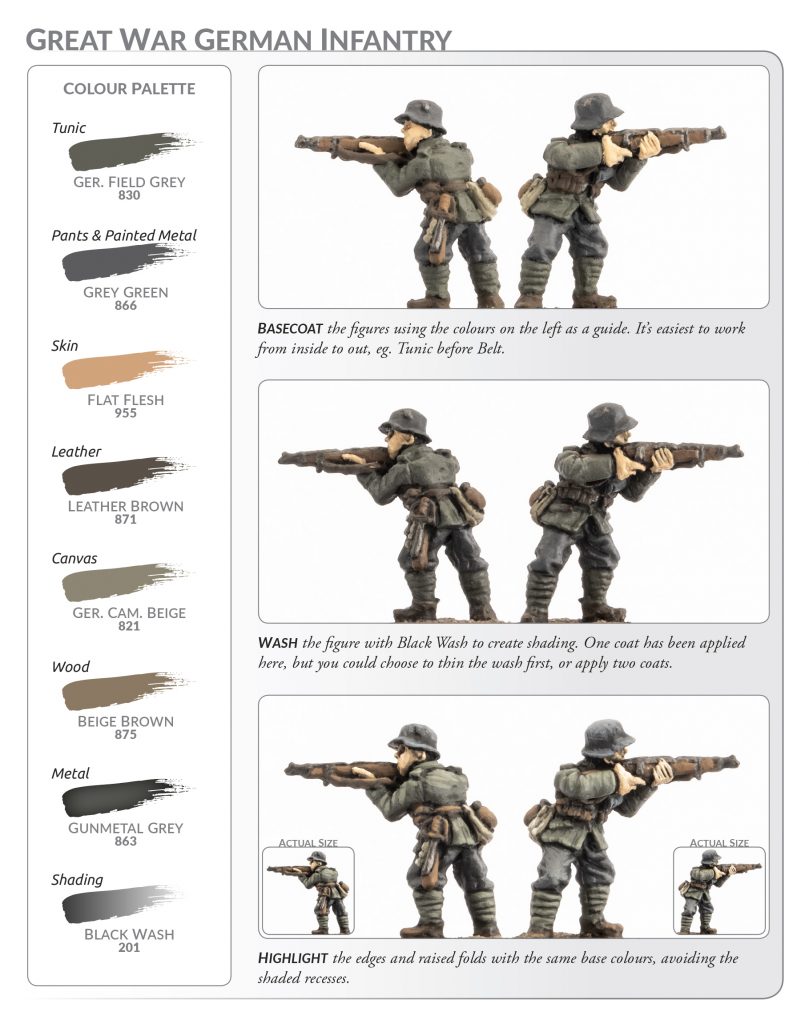
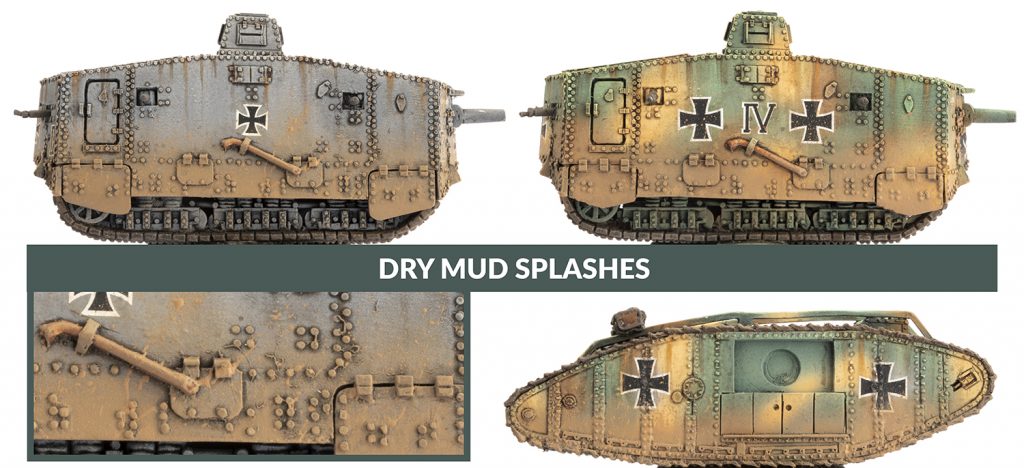
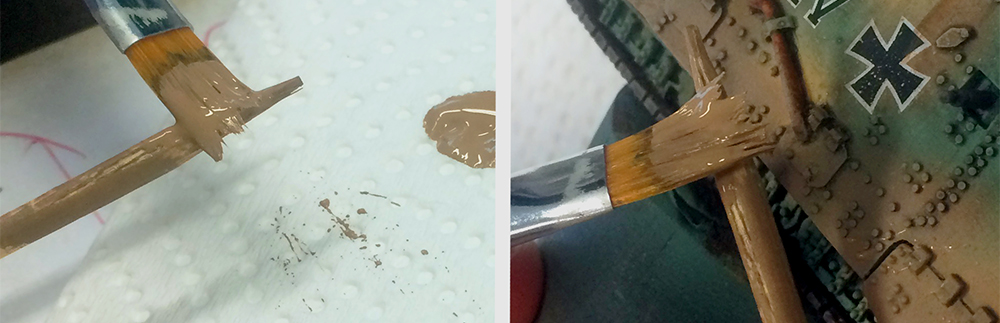
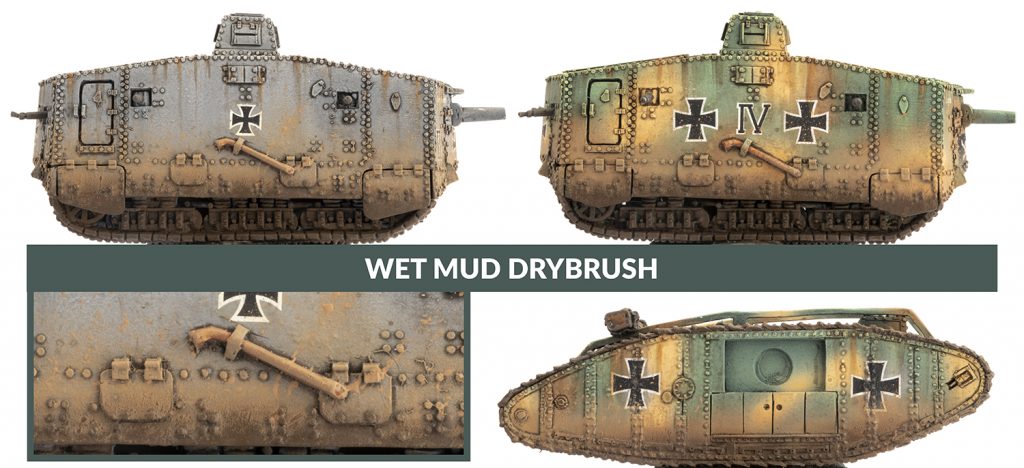
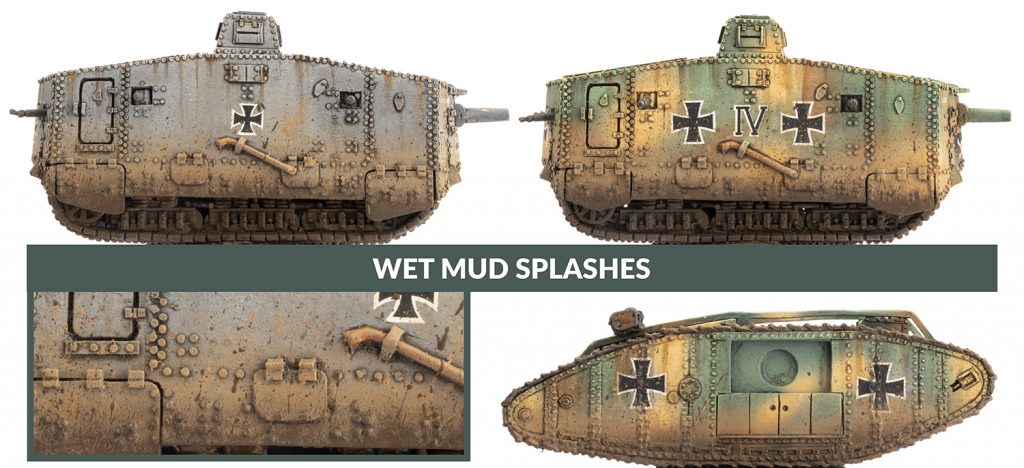
 Great War Germans:
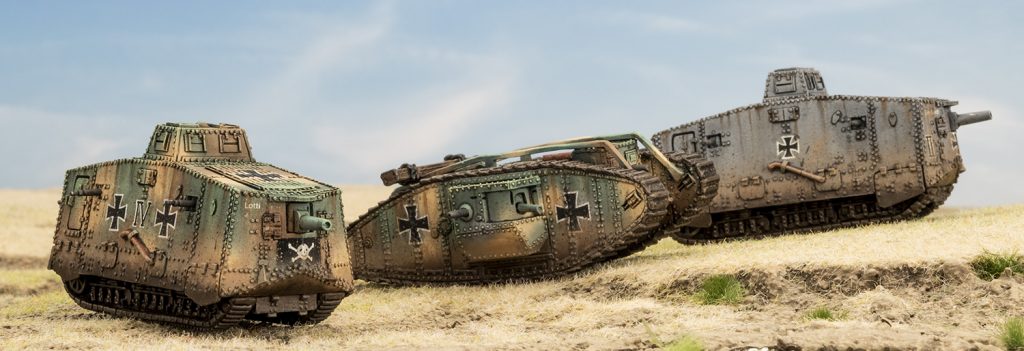
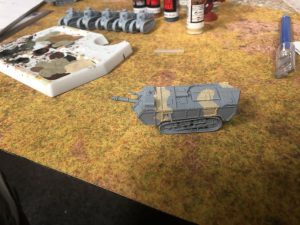
 Well, wish us luck on our assembly and massive painting project!
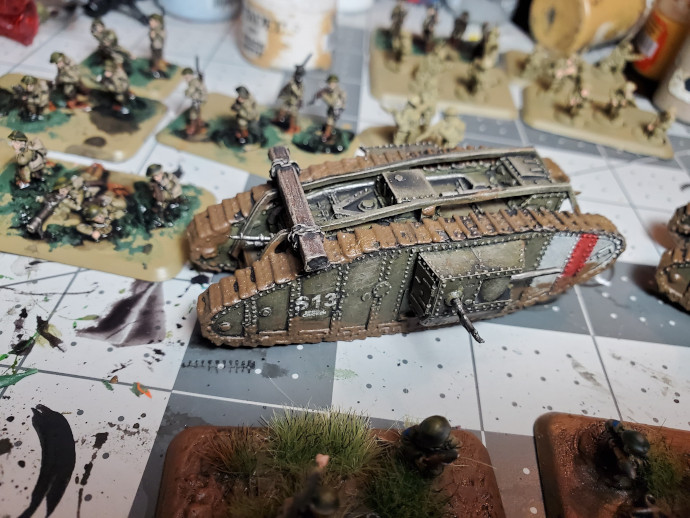

 With Chris Potter, BF UK Office
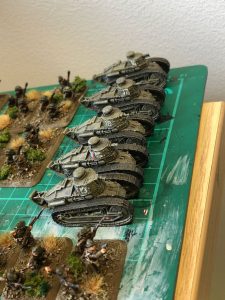
 With Chris Potter, BF UK Office
 The other key feature that drew me to the Belgians, is the quirk whereby their formations have access to British
 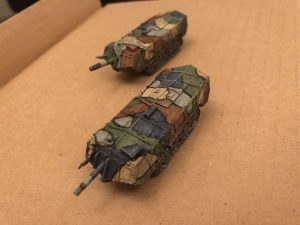 This presents some interesting painting opportunities for me on the French tanks, as well as in gaming terms, being able to field large armies of troops which have access to some quite tasty kit. And the plus side is I have already got a pile of French troops sat in my to-do pile from the first time Battlefront released Great War before this current version. So hurrah! All I need is to pick up some extra weapons platoons and a Unit Card Pack, and I will be good to go.