Posted on

Wargaming Myths Of The Great War

with Mike Haught

World War I wargaming… If you ask some gamers to describe what WWI wargames are like, you might hear some common words like: mud, trenches, barbed wire, attrition, and poison gas. Some may even describe the games as slow, static, tedious, or long grinding setpiece battles. A common belief (indeed one I previously held) is that whatever World War I wargaming is, there was certainly one thing that it’s not: dynamic. This has a lot to do with assumptions make about this period of modern warfare.

Even as wargamers, we tend to make assumptions about the Great War that are simply not founded in history or wargaming. I was no exception, believing several misconceptions about Great War gaming. Don’t get me wrong, I love World War I as a subject. It’s actually the historical event that inspired me to study history at university in the first place. But I did have reservations about World War I as a company-level wargame. I believed four basic things got in the way of a fun WWI game.

1. World War I games are a grind with constant artillery bombardments.

2. WWI games are static with both sides dug in, waiting for the first player to go ‘over the top.’

3. Attacking infantry constantly have to assault heavy machine-guns.

4. Tanks are super rare, plodding along, and barely able to support infantry.

Over the years, talking with Phil and Wayne, I came to realise that all four preconceptions about WWI wargaming were largely, and happily, unfounded. World War I warfare was very dynamic, especially in 1918, with a lot of action and reaction. Let’s have a look at these and bust some myths about Great War gaming.

Artillery

A common fear with World War I gaming is how artillery is handled. Personally, this was my number one concern. I think my worry had a lot to do with the fact that WWI was one of the first wars where shrapnel was the largest causes of casualties in a war, so I assumed that artillery did most of the fighting. I didn’t want to see games devolve into artillery parks slugging it out over the heads of the infantry. This makes for a boring and tedious game, so I put this high on my list of things to consider.

Turns out, history has the answer. I was approaching the problem with the knowledge of WWII artillery tactics and capabilities. WWI artillery was indeed prolific, firing thousands of shells in harassing and preparatory bombardments. It proved to be invaluable for helping get the infantry close to the enemy. Once the infantry was in, they ceased firing or carried on rolling the barrage beyond the trenches to interdict reserves and enemy artillery.

Furthermore, the communications capabilities of the field artillery were limited to carrier pigeon, phone lines and incredibly unreliable early radios. In the end, WWI artillery was simply not the flexible tactical weapon that it was in WWII.

In Flames Of War terms, this means that the WWI artillery’s main function happens before the game actually begins. This is reflected in the Preliminary Bombardment special rule where the defender starts the game Pinned Down, owing to the mind-numbing effect of the barrage. This is also why the attacker starts so close to the enemy trenches, having followed the rolling barrage right up to the enemy front line. The artillery has guided the infantry to it’s assault position and the game is on!

So, you might ask, why have artillery at all? There were occasions where artillery batteries were the objective an assault. It is for this reason we’ve included them as an option to take with your forces. When attacked, the batteries fought hard and were well-defended by infantry, so we wanted to make they got to see some action. Plus, they played a key role in anti-tank defence, so they are quite useful in that way as well.
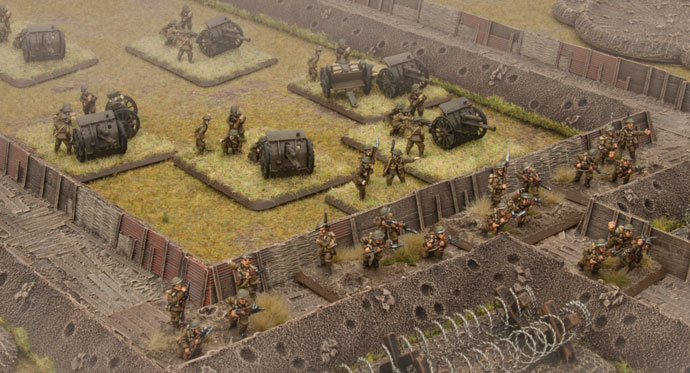
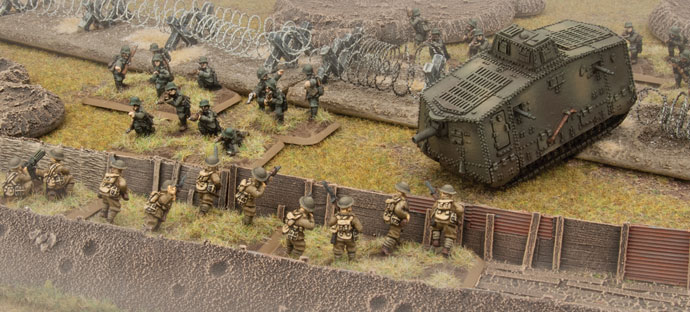
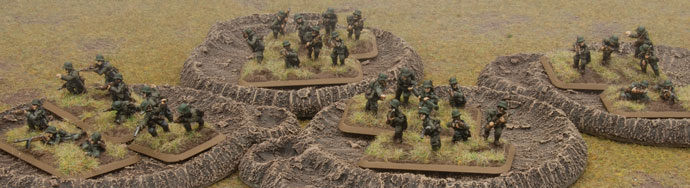
Static Warfare

One of the first things people think about when you mention WWI is trenches and static warfare. Static battles were also one of my biggest fears about World War I gaming. Two sides are dug in facing each other, both within grenade-throwing range. Heavy machine-guns on both sides have locked down no-man’s-land with interlocking fields of fire. The first side to step into no-man’s-land was already dead—it was only a matter of time.

In wargaming terms this sort of warfare is static, each player hoping to snipe out the enemy with rifle fire or HMG bursts over a long, gruelling, and ultimately boring game. Game theory suggests that neither player would ever leave the safety of their trench to attack the enemy. So in this case the optimum strategy (or the Nash Equilibrium, for those game theory nerds like me out there!) is to sit in your holes and wait for the enemy to come at you, which they’ll never do because they have the same optimal strategy — tick-tock, tick-tock…

However, looking at the battlefields of 1916-1918, the trenches were placed quite a ways apart. They were rarely within accurate rifle-range, and certainly not within reach of a grenade toss. So assaults were not launched directly from one trench to another after a few steps across no-man’s-land. The attackers had to leave their trenches behind, cross a large amount of no-man’s-land, and then assault the defender’s trench.

When designing the new Great War missions, this led us discard the attacker’s trench line, and focus the action on the defender’s trenches. This results in quite a dynamic game, with the attacker having no choice but to assault the enemy trench in order to win. Sitting back and picking off the defenders with rifle fire is not going to work, so it’s time to fix bayonets!
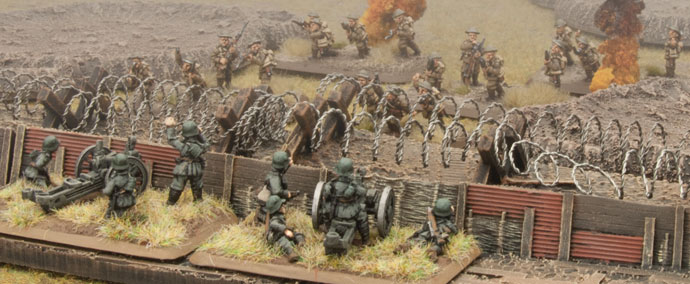
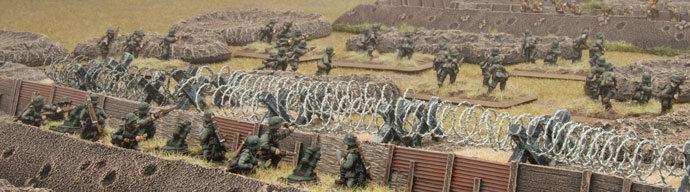
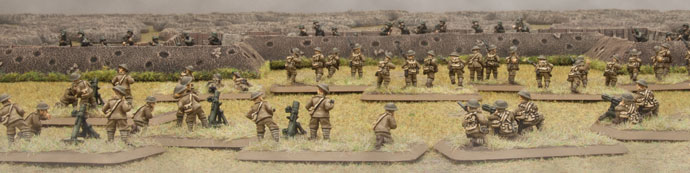
Machine-guns

The machine-gun was certainly a huge leap forward in infantry firepower when it entered into wide-spread use. They drastically improved the chances of defending infantry to hold out against enemy assaults. During the early days of trench warfare, the machine-gun was an unconquerable force. However, it didn’t take long for both sides to start developing an antidote.

My concern here was that with so many weapons with low firepower ratings (the bulk of them having Firepower 6), heavy machine-guns were going to be an automatic win option. Hard to kill and impossible to silence, the HMG will rule the battlefield, cutting down attacking infantry with their long range and high rate of fire.

The solution in the game is same as it was in history: the simple trench mortar. What I didn’t realise before was just how many of these weapons were produced and how common they were on the front. I had seen pictures, but I assumed they were simply trench artillery, there to support the rolling barrage and nothing more. When I dug a bit deeper, I found that the trench mortars’ role was to support the attacking infantry by neutralising enemy strong points and nests.

Adding trench mortars will get things moving for assaulting infantry, and restore balance to the gun battle over no-man’s-land. Of course there is one more solution to deal with machine-guns: tanks.
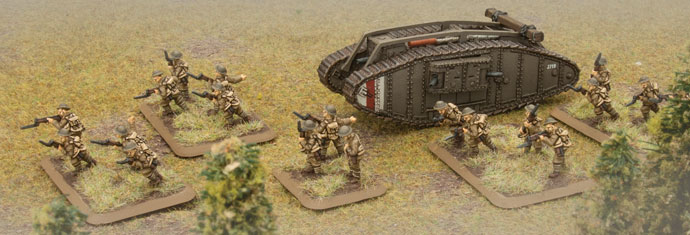
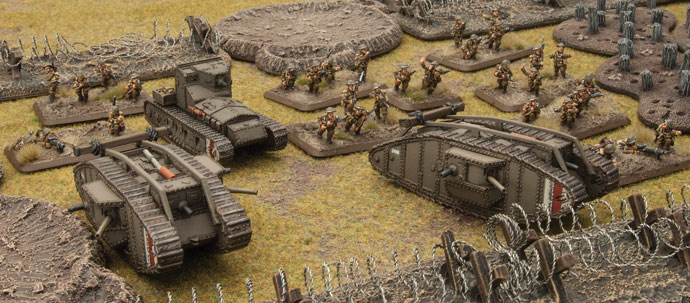
Tanks

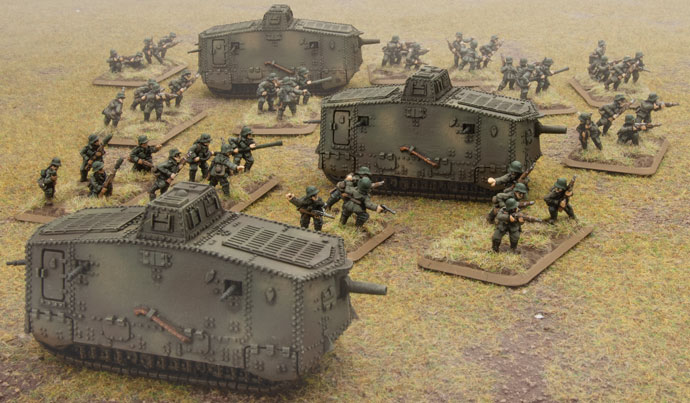
It’s well known that the Great War ushered in the modern tank as a weapon of war. These tanks are iconic and wonderfully awkward. We sometimes forget that the Mark IV and A7V tanks were the cutting edge of modern technology. They were the highest symbol of combat power, demanding the attention of everyone on the battlefield.

I don’t know why, but I’d always assumed that tanks were rare on the battlefield, maybe a couple of dozen per nation. However, looking into the numbers I was blown away with not only how many tanks were built, but just how many were committed to battle.

When tanks were committed to an assault, they didn’t do anything in half-measures. Both sides used the tank as a breakthrough weapon, so their natural position on the battlefield was leading an assault, not distributed piecemeal across a wide front.

For example, at Villers-Bretonneaux, the Germans committed all three of its A7V battalions to the battle, a total of 13 tanks. While these battalions were split across three attack divisions, the tanks of each fought close together in batches of three, four, or six tanks. For their part, the British and French had even more tanks and committed hundreds to important attacks, especially in 1918.

So, in Great War Flames Of War games, an infantry company at the cutting edge of an assault are perfectly justified to be supported by several tanks. Not only are they are a very important tool to consider for breaking through the enemy’s trenches, but they are amazingly fantastic models to paint and field.

What About Gas Attacks?

Generally speaking, gas attacks fall outside the scope of Flames Of War. Fighting in gas masks is very difficult, so gas bombardments were kept away from the area that was about to be assaulted, as gas would make the difficult task of taking a trench that much harder!

Gas was a usually a component of the preliminary bombardments, used to suppress enemy artillery and reserves. The effect of gas in Flames Of War suppresses and disrupts the enemy and then dissipates. So gas bombardments are wrapped up in the Preliminary Bombardment and Delayed Reserves special rules.
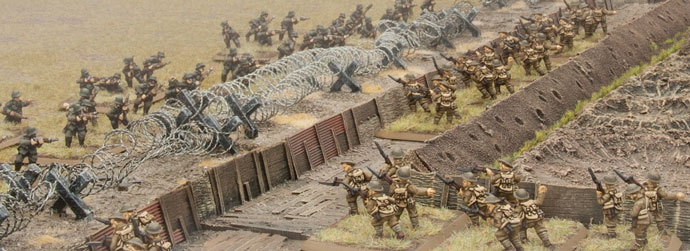
The Mud Of Flanders

It’s easy to envision the WWI battlefield as mud, pools of water, and shattered trees, crossed by trenches and barbed wire. This led me to think that I’d needed to build a new wargames table for World War I (not to say I didn’t welcome the opportunity). While this image of muddy fields is certainly true for some areas of the front line, they were only a small fraction of 1918 battlefields.

The breakthrough battles of 1918 were more often than not fought over ground relatively untouched by war, so getting into Great War gaming is rather easy using your existing collection of 15mm terrain.

Fix Bayonets!
This project was a delight to work on. I’ve rarely been so happy to be so wrong about a period of wargaming. Great War gaming is indeed dynamic and fun. With this supplement for Flames Of War, you’ll find that your infantry are the key to success. They are armed with the most advanced tactics and equipment of the time, and they are ready to go Over the Top and end this long war.

Tell your men to stand by their trench ladders, count down the seconds on your watch, and prepare to blow the whistle…

~ Mike.

Posted on

Mythbusting The Great War: Mud, Barbed Wire, and Machine-guns

The common perception of the First World War has brave soldiers, led by old and foolish generals, living in muddy trenches until the time comes to go ‘over the top’ in suicidal charges, slogging through mud while being mown down by machine-guns, until they reach the enemy wire where the handful of survivors are cut down. While there are elements of truth in each part of that sentence, it is neither an accurate, nor a useful, description of the Great War.

The First World War lasted four years from August 1914 to November 1918. During that time, the nature of warfare changed dramatically. Despite the battles of the opening phases and the closing phases of the war being conducted over much the same area, the men who fought in 1914 would have found almost everything, including the uniforms, weapons, tactics radically changed in the 1918 battles.

Not only did the First World War change over time, but it was a world-wide war. While France, Poland, and the Ukraine were the main events, there was fighting as far afield as the Middle East, Africa, and even the Pacific Islands and China. Encapsulating such varied battles into a single image is simply impossible. To keep things manageable, I’m just going to focus on the Western Front, Belgium and France, the subject of the stereotype in the introduction.

Lions Led By Donkeys

The old saying ‘Lions led by donkeys’ is often applied to the First World War, implying that the generals were incompetent (usually compounded with allegations that they spent all their time in châteaus to the rear). Like any war, there were incompetent generals, but they certainly weren’t the norm. The problem wasn’t the quality of the generals, but the difficulty of solving the problems of a new type of warfare.

August 1914, it opened with the Battle of the Frontiers. Tactics on both sides were little changed from the Franco-Prussian War of 1870, with the lethal addition of magazine-fed rifles, machine-guns, and quick-firing artillery, and casualties were enormous. By mid-September when the German advance was halted on the Marne, the French and German armies had taken over 300,000 casualties apiece (nearly 10,000 per day!), with the smaller British Army taking a mere 30,000 casualties. The illusion of a quick victory had vanished in the smoke of battle, leaving trenches running from Switzerland to the English Channel by the end of the year.

1915 saw the Germans concentrating on the Eastern Front, while the French launched a series of major offensives on the Western Front. They quickly learned that properly co-ordinated artillery fire was essential to success. The Germans responded by digging a second, then a third line of trenches, and the elusive breakthrough remained tantalisingly out of reach. Both sides developed new weapons and tactics, with hand grenades, trench mortars, flame-throwers, gas, and specialist assault troops making their appearance.

By 1916, these tactics seemed to be bearing fruit. The initial German offensive at Verdun in February 1916 was so successful, that instead of stopping and going onto the defensive to wipe out the expected French counterattacks like planned, the Germans attempted to take the whole salient, and nearly succeeded. Fortunately for the French, the British had spent 1915 (aside from a few offensives) building up their army ready for a major offensive in the Summer of 1916. This kicked off on the Somme on 1 July, drawing German troops away from the hard-pressed Verdun salient.

Having learned from their earlier experiences and their French allies, The British offensive was preceded by the heaviest artillery bombardment up to that point. A five day bombardment fired over a million shells. Nobody expected the German defenders to be able to stop the offensive after that.


Charging Machine-guns

At this point in the narrative we come to the next myth. On 1 July 1916, 13 British and 6 French divisions left their trenches, and walked into disaster. The bombardment had not silenced the German machine-guns, nor shredded the barbed wire. The British took 57,000 casualties (nearly 20,000 dead) on that one day for little gain. This day has since come to symbolise the whole war, and people assume that the rest of the Somme Offensive was more of the same.

The experienced French divisions took a mere 1590 casualties on 1 July, (about a twentieth of the equivalent British casualties per division) and took many of their objectives. The problem had been one of inexperience and grand ambition rather than necessity.

The British demonstrated this by halting the offensive for two weeks while reverting to ‘Plan B’. Instead of a grand attack on a massive frontage, the British adopted to ‘Bite and Hold’ tactics. They would launch a well-prepared attack with a smaller, better trained, force onto an objective, then smash the inevitable German counterattack. Then, they would repeat this again and again. The validity of these tactics was upheld by the results. For the rest of that Summer, the British and French (both on the Somme and in their counter-offensive at Verdun) generally took their objectives and slowly pushed the Germans back until bad weather closed down the offensives as winter approached.

Mud, Mud, and More Mud

Which brings us to the mud. Unsurprisingly, First World War battlefields were very muddy during the winter, particularly in the low-lying Flanders area. Fortunately for the soldiers, most of the fighting took place in better weather, although the generals had a tendency to try and get just a little more out of their offensives, rather than halting them as the weather deteriorated. This did result in some attacks being made in atrocious conditions, leading to the myth that all attacks were made in deep mud.

Despite the comparative rarity of attacks in deep mud, the soldiers still had to endure bad weather in their trenches, an experience that was universally loathed. Fortunately for the soldiers, they only spent a couple of days in the front line trenches before being cycled back to the second line trenches, then the reserve trenches, and then back to billets for rest, recovery, and training for a week or more. Still, a week in muddy trenches in freezing weather is not something I’d wish on anyone.

Improved Tactics

In early 1917, the Germans abandoned the Somme battlefields, withdrawing to the Hindenburg Line, a carefully fortified position intended to be held with fewer troops than the old, longer front line. With the arrival of Spring 1917, the British and French began their next cycle of offensives. These were optimistically expected to make major gains as they combined the lessons from the past year with new technology.

As part of the continual development of tactics during the Somme fighting, artillery barrages gained considerably in sophistication, giving the infantry more support and protection throughout the different phases of the attacks. The artillery was still very inflexible, radio being in its infancy, so the infantry had almost no control over it if their circumstances changed, but careful planning still made it incredibly useful.

Another important innovation in the Somme fighting was the tank. The first British tanks went into action at Flers–Courcelette in September 1916. The few tanks used in their first attack had relatively little effect, but over the next two years, they matured into a potent weapon.

The French Army had a new commander in chief, General Robert Nivelles. Following his successful counter-offensive at Verdun, Nevilles believed he had the formula for a decisive breakthrough. He attacked using the new artillery tactics and massed tanks, expecting to break the German line in two days. Unfortunately, the attack had been much heralded in the papers and the Germans were ready for it. The French gained little (apart from a better appreciation of the need for information security) and suffered heavy casualties. The French soldiers had given their best, and were exhausted. Mutinies and unrest took the French Army out of the picture for the rest of the year.

While the French had reached their peak in 1916, the British hit their stride in 1917. Their attacks in the Arras and Ypres areas were generally successful in pushing the Germans back, although they were unable to punch right through the Hindenburg Line. Once again, the year ended with the final attacks around Passchendaele in the Flanders area being carried out in atrocious conditions including deep mud.

Breakthroughs

The final attack of 1917, at Cambrai in early winter, was a taste of things to come. Here the ground was well-drained chalk, so mud was not an issue, but the big difference was the sheer number of tanks used. At the start of the year, a battle might have 100 tanks. Around Ypres, the British used 200 tanks. This time they used 378 tanks with another 98 in support and supply roles. Disdaining a massive bombardment to maintain the element of surprise, a thousand guns firing the latest HE and smoke shells deluged the German trenches in a hurricane of fire as the tanks advanced. By the end of the day, the lead elements were through the Hindenburg Line, 8km (6.5 miles) from their start point.

Although this attack pointed the way to the future, its success took the British by surprise and they lacked the resources to exploit it, digging in to hold their gains instead. Here once again, we come face-to-face with myth. The generals in charge of the Allied armies have been widely decried for maintaining a significant force of cavalry through 1915 and 1916 before sending most of them into the trenches as infantry in 1917. However, horse-mounted cavalry was the only exploitation force available at the time, and its lack now prevented a local victory being transformed into something more significant.

The popular view is that there was no place for cavalry in trench warfare, so how would cavalry have helped? The answer is manifold, but some examples of small scale cavalry actions during the Somme fighting during the peak of trench warfare in 1916 point the way. Many of the attacks of 1916 had a small cavalry element in reserve to exploit success. In one case, the cavalry charged a small wood, routing the Germans, then dismounted to hold their gains. They still had half of the wood despite heavy German counterattacks when the infantry finally arrived to relieve them. In another case, cavalry charged a reserve trench, jumping the barbed wire entanglements, then dismounted and cleared the position.

The Green Fields Beyond

As 1918 arrived, the British and French were exhausted. The Americans were coming and should be ready to play their part by the middle of the year, so the plan was to cease offensive operations until then. Unfortunately for this plan, the Germans had knocked Russia out of the war, freeing up troops for the Western Front. Needing victory before the Americans arrived in numbers, they attacked in March.

Using all the techniques they’d learned in three years of bloody battle, the Germans broke through the weakened British and French lines in a series of offensives ending in June. Their advances were spectacular, up to 55km (35 miles), but their lack of a plan for how to exploit their successes, and a lack of a mobile force to throw into the gap ended up making their gains as fruitless as ever. No longer hindered by trenches and barbed wire, Allied cavalry and armoured cars played a significant part in slowing the German advances.

With the German offensives halted, the Allies went on the attack in August. Backed by well-planned artillery barrages, massed tanks, and using the latest infantry weapons, the British, French, and American armies smashed through the German defensive lines, then proceeded to punch through every attempt the Germans made to halt their advance. In ‘The Hundred Days’, the Allies pushed the Germans out of France and forced them to sue for peace. The age of trench warfare was well and truly over.

As you can see, the First World War did include more than enough mud, barbed wire, and machine-guns, but they were far from the sum total of the war. For a wargamer, there is plenty of scope for all sorts of battles, even if you restrict yourself to the Western Front!
~Phil

Posted on

Welcome to the Great War Website

1918 saw great changes in the warfare of the Western Front in France and Belgium. The Germans moved 500,000 men from the Eastern Front to the Western Front after the Russians pulled out of the war, and launched a series of offensives to break the Allied lines between March and July 1918. Great gains were made and the Allies’ positions were pushed back huge distances.

The Germans utilised specialist offensive troops, the Stosstruppen (shock troops), to lead the attacks, using fire and moment to bypass and outflank enemy defensive positions. However, tenacious defence and the timely allocation of reserves by the British, French and Americans was finally able to halt the German progress in July.

The Allies immediately launched a series of offensives that gave no respite to the now exhausted Germans. With new tanks to break though German positions and the Allies’ own implementation of fire and movement tactics, they pushed the Germans back towards their own borders and defeat.

————–

Great War Launch Sale

To celebrate the launch of Great War (in store 16 March) we have opened up our webstore so you can start placing your pre-orders now. To celebrate our return to this period of history we will also be having a Launch Sale. The sale will apply to everything in the store, with the exception of the Book, Army Deals and Unit Card Packs.

Whether you are looking to add some new units to your existing armies, or start a completely new one now is a great time to take advantage of the 25% Discount Launch Sale.

Click here to go the Great War webstore…


Posted on

Great War Book Spotlight

This year we have expanded our original Great War book and expanded it to include full rules and more forces. Great War now uses the same rules system as the new version of Flames Of War, version 4 as is commonly called. Great War has come a long way since it was released as a free booklet with Wargames Illustrated 324. The book now comes with the complete rules, missions and comprehensive forces for the Western Front in 1918.

Read the Great War Book Spotlight here…