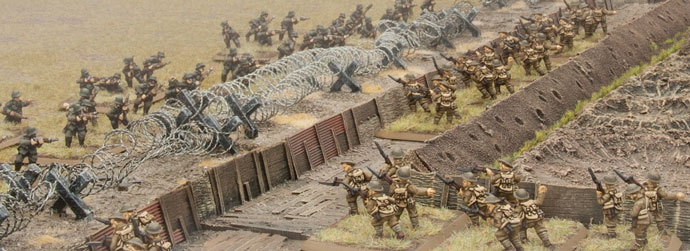
The common perception of the First World War has brave soldiers, led by old and foolish generals, living in muddy trenches until the time comes to go ‘over the top’ in suicidal charges, slogging through mud while being mown down by machine-guns, until they reach the enemy wire where the handful of survivors are cut down. While there are elements of truth in each part of that sentence, it is neither an accurate, nor a useful, description of the Great War.
The First World War lasted four years from August 1914 to November 1918. During that time, the nature of warfare changed dramatically. Despite the battles of the opening phases and the closing phases of the war being conducted over much the same area, the men who fought in 1914 would have found almost everything, including the uniforms, weapons, tactics radically changed in the 1918 battles.
Not only did the First World War change over time, but it was a world-wide war. While France, Poland, and the Ukraine were the main events, there was fighting as far afield as the Middle East, Africa, and even the Pacific Islands and China. Encapsulating such varied battles into a single image is simply impossible. To keep things manageable, I’m just going to focus on the Western Front, Belgium and France, the subject of the stereotype in the introduction.
Lions Led By Donkeys
The old saying ‘Lions led by donkeys’ is often applied to the First World War, implying that the generals were incompetent (usually compounded with allegations that they spent all their time in châteaus to the rear). Like any war, there were incompetent generals, but they certainly weren’t the norm. The problem wasn’t the quality of the generals, but the difficulty of solving the problems of a new type of warfare.
August 1914, it opened with the Battle of the Frontiers. Tactics on both sides were little changed from the Franco-Prussian War of 1870, with the lethal addition of magazine-fed rifles, machine-guns, and quick-firing artillery, and casualties were enormous. By mid-September when the German advance was halted on the Marne, the French and German armies had taken over 300,000 casualties apiece (nearly 10,000 per day!), with the smaller British Army taking a mere 30,000 casualties. The illusion of a quick victory had vanished in the smoke of battle, leaving trenches running from Switzerland to the English Channel by the end of the year.
1915 saw the Germans concentrating on the Eastern Front, while the French launched a series of major offensives on the Western Front. They quickly learned that properly co-ordinated artillery fire was essential to success. The Germans responded by digging a second, then a third line of trenches, and the elusive breakthrough remained tantalisingly out of reach. Both sides developed new weapons and tactics, with hand grenades, trench mortars, flame-throwers, gas, and specialist assault troops making their appearance.
By 1916, these tactics seemed to be bearing fruit. The initial German offensive at Verdun in February 1916 was so successful, that instead of stopping and going onto the defensive to wipe out the expected French counterattacks like planned, the Germans attempted to take the whole salient, and nearly succeeded. Fortunately for the French, the British had spent 1915 (aside from a few offensives) building up their army ready for a major offensive in the Summer of 1916. This kicked off on the Somme on 1 July, drawing German troops away from the hard-pressed Verdun salient.
Having learned from their earlier experiences and their French allies, The British offensive was preceded by the heaviest artillery bombardment up to that point. A five day bombardment fired over a million shells. Nobody expected the German defenders to be able to stop the offensive after that.
Charging Machine-guns
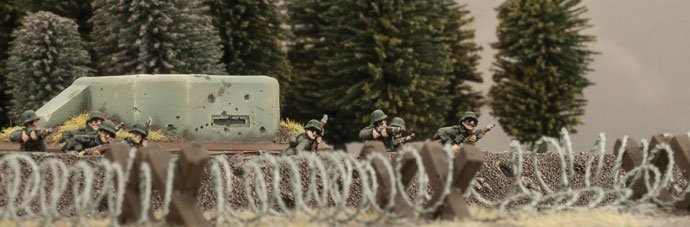
At this point in the narrative we come to the next myth. On 1 July 1916, 13 British and 6 French divisions left their trenches, and walked into disaster. The bombardment had not silenced the German machine-guns, nor shredded the barbed wire. The British took 57,000 casualties (nearly 20,000 dead) on that one day for little gain. This day has since come to symbolise the whole war, and people assume that the rest of the Somme Offensive was more of the same.
The experienced French divisions took a mere 1590 casualties on 1 July, (about a twentieth of the equivalent British casualties per division) and took many of their objectives. The problem had been one of inexperience and grand ambition rather than necessity.
The British demonstrated this by halting the offensive for two weeks while reverting to ‘Plan B’. Instead of a grand attack on a massive frontage, the British adopted to ‘Bite and Hold’ tactics. They would launch a well-prepared attack with a smaller, better trained, force onto an objective, then smash the inevitable German counterattack. Then, they would repeat this again and again. The validity of these tactics was upheld by the results. For the rest of that Summer, the British and French (both on the Somme and in their counter-offensive at Verdun) generally took their objectives and slowly pushed the Germans back until bad weather closed down the offensives as winter approached.
Mud, Mud, and More Mud
Which brings us to the mud. Unsurprisingly, First World War battlefields were very muddy during the winter, particularly in the low-lying Flanders area. Fortunately for the soldiers, most of the fighting took place in better weather, although the generals had a tendency to try and get just a little more out of their offensives, rather than halting them as the weather deteriorated. This did result in some attacks being made in atrocious conditions, leading to the myth that all attacks were made in deep mud.
Despite the comparative rarity of attacks in deep mud, the soldiers still had to endure bad weather in their trenches, an experience that was universally loathed. Fortunately for the soldiers, they only spent a couple of days in the front line trenches before being cycled back to the second line trenches, then the reserve trenches, and then back to billets for rest, recovery, and training for a week or more. Still, a week in muddy trenches in freezing weather is not something I’d wish on anyone.
Improved Tactics
In early 1917, the Germans abandoned the Somme battlefields, withdrawing to the Hindenburg Line, a carefully fortified position intended to be held with fewer troops than the old, longer front line. With the arrival of Spring 1917, the British and French began their next cycle of offensives. These were optimistically expected to make major gains as they combined the lessons from the past year with new technology.
As part of the continual development of tactics during the Somme fighting, artillery barrages gained considerably in sophistication, giving the infantry more support and protection throughout the different phases of the attacks. The artillery was still very inflexible, radio being in its infancy, so the infantry had almost no control over it if their circumstances changed, but careful planning still made it incredibly useful.
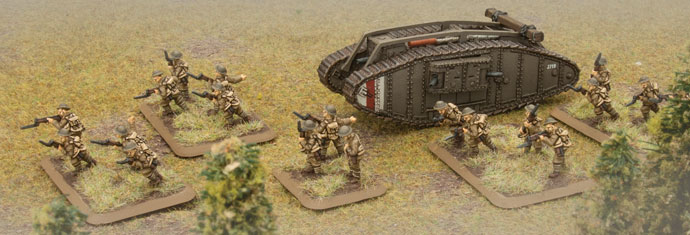
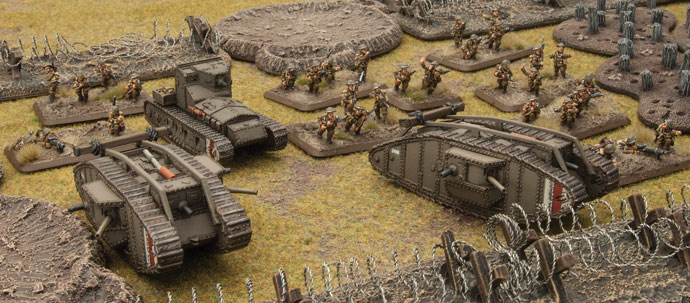
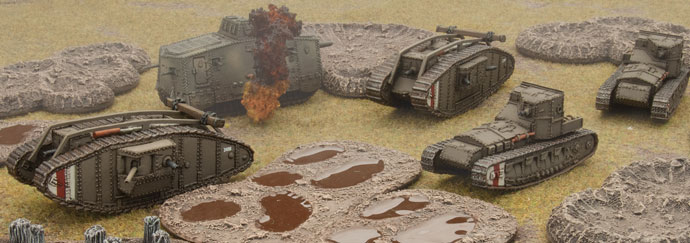
Another important innovation in the Somme fighting was the tank. The first British tanks went into action at Flers–Courcelette in September 1916. The few tanks used in their first attack had relatively little effect, but over the next two years, they matured into a potent weapon.
The French Army had a new commander in chief, General Robert Nivelles. Following his successful counter-offensive at Verdun, Nevilles believed he had the formula for a decisive breakthrough. He attacked using the new artillery tactics and massed tanks, expecting to break the German line in two days. Unfortunately, the attack had been much heralded in the papers and the Germans were ready for it. The French gained little (apart from a better appreciation of the need for information security) and suffered heavy casualties. The French soldiers had given their best, and were exhausted. Mutinies and unrest took the French Army out of the picture for the rest of the year.
While the French had reached their peak in 1916, the British hit their stride in 1917. Their attacks in the Arras and Ypres areas were generally successful in pushing the Germans back, although they were unable to punch right through the Hindenburg Line. Once again, the year ended with the final attacks around Passchendaele in the Flanders area being carried out in atrocious conditions including deep mud.
Breakthroughs
The final attack of 1917, at Cambrai in early winter, was a taste of things to come. Here the ground was well-drained chalk, so mud was not an issue, but the big difference was the sheer number of tanks used. At the start of the year, a battle might have 100 tanks. Around Ypres, the British used 200 tanks. This time they used 378 tanks with another 98 in support and supply roles. Disdaining a massive bombardment to maintain the element of surprise, a thousand guns firing the latest HE and smoke shells deluged the German trenches in a hurricane of fire as the tanks advanced. By the end of the day, the lead elements were through the Hindenburg Line, 8km (6.5 miles) from their start point.
Although this attack pointed the way to the future, its success took the British by surprise and they lacked the resources to exploit it, digging in to hold their gains instead. Here once again, we come face-to-face with myth. The generals in charge of the Allied armies have been widely decried for maintaining a significant force of cavalry through 1915 and 1916 before sending most of them into the trenches as infantry in 1917. However, horse-mounted cavalry was the only exploitation force available at the time, and its lack now prevented a local victory being transformed into something more significant.
The popular view is that there was no place for cavalry in trench warfare, so how would cavalry have helped? The answer is manifold, but some examples of small scale cavalry actions during the Somme fighting during the peak of trench warfare in 1916 point the way. Many of the attacks of 1916 had a small cavalry element in reserve to exploit success. In one case, the cavalry charged a small wood, routing the Germans, then dismounted to hold their gains. They still had half of the wood despite heavy German counterattacks when the infantry finally arrived to relieve them. In another case, cavalry charged a reserve trench, jumping the barbed wire entanglements, then dismounted and cleared the position.
The Green Fields Beyond
As 1918 arrived, the British and French were exhausted. The Americans were coming and should be ready to play their part by the middle of the year, so the plan was to cease offensive operations until then. Unfortunately for this plan, the Germans had knocked Russia out of the war, freeing up troops for the Western Front. Needing victory before the Americans arrived in numbers, they attacked in March.
Using all the techniques they’d learned in three years of bloody battle, the Germans broke through the weakened British and French lines in a series of offensives ending in June. Their advances were spectacular, up to 55km (35 miles), but their lack of a plan for how to exploit their successes, and a lack of a mobile force to throw into the gap ended up making their gains as fruitless as ever. No longer hindered by trenches and barbed wire, Allied cavalry and armoured cars played a significant part in slowing the German advances.
With the German offensives halted, the Allies went on the attack in August. Backed by well-planned artillery barrages, massed tanks, and using the latest infantry weapons, the British, French, and American armies smashed through the German defensive lines, then proceeded to punch through every attempt the Germans made to halt their advance. In ‘The Hundred Days’, the Allies pushed the Germans out of France and forced them to sue for peace. The age of trench warfare was well and truly over.
As you can see, the First World War did include more than enough mud, barbed wire, and machine-guns, but they were far from the sum total of the war. For a wargamer, there is plenty of scope for all sorts of battles, even if you restrict yourself to the Western Front!
~Phil
 Over on No Dice, No Glory they’ve been pouring over the Great War book with the different formations and armies you can take as well some of the strategies they’ll be employing to get the most out of their great war posts. Check them all out in the links below.
 Book your leave passes now!
 1918 Western Front further expanded!
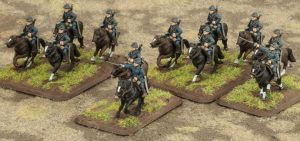 The final French formation is the Escadron de Cavalerie (Cavalry Squadron). Like the British the French saw Cavalry as something to be used for the final exploitation phase of an offensive. The French went on step further and actually integrated their White AM 1915/18 armoured cars into the squadrons.
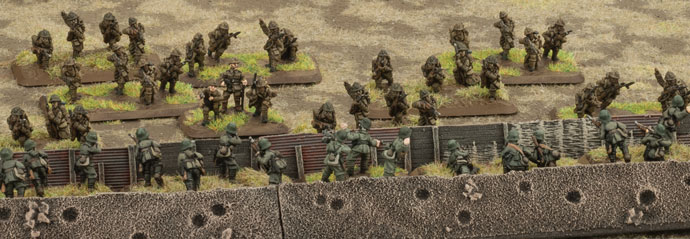
 In Great War you can field three different American Rifle Companies, 1st Infantry Division veterans, fresh 42nd Infantry Divisions and elite 4th Marine Brigade troops. The selection of the 1st and 42nd Infantry divisions does not limit your choice of them. Select your favourite divisions and use which ever one you think best suit them. American rifle companies are large with up to eight half platoons, with supporting firepower from machine-guns and mortars.